There’s something deeply satisfying about pulling a warm, puffed pita out of the oven—its pillowy texture and golden brown edges tell you everything you need to know before even taking a bite.
I started making pita bread out of a desire to recreate the fresh, soft, and slightly chewy flatbreads I had at a small Middle Eastern café in the heart of Chicago. Nothing store-bought ever compared. It was always too dry, too dense, or lacking that signature pocket.
Once I learned how simple the process really is—with basic ingredients and a bit of technique—I couldn’t stop making them.
If you’ve never baked bread before, this recipe is the perfect starting point. And if you have, you’ll be amazed at how much better homemade pita tastes compared to anything you can buy.
Why I Love This Recipe
Homemade pita bread is a game-changer in the kitchen.
Not only is it incredibly soft and flexible, but it also puffs up like magic in the oven, creating the signature pocket that makes it ideal for stuffing. The beauty of this recipe is its versatility: use it as a base for gyros, dip it into creamy hummus, layer it with grilled veggies, or even turn it into chips.
What makes this recipe so special is the way it marries ease with quality. You don’t need a stand mixer or any fancy equipment—just a mixing bowl, a rolling pin, and a baking sheet.
The dough is forgiving, which is perfect for beginner bread makers. With a short list of ingredients—flour, yeast, salt, sugar, water, and olive oil—you’ll be surprised at how much flavor and structure you can create.
Best of all, these pita breads are free of preservatives and additives, which means they taste fresher, toast better, and freeze beautifully.
Once you experience pita puffing up in your oven, it’s hard to go back.
Ingredients for Pita Bread
To make pita bread at home, you’ll only need a handful of pantry staples—but each plays a key role in flavor and texture.
All-purpose flour
This is the foundation of your dough. It gives the pita its chew and body. You can substitute part of it with whole wheat flour for a nuttier flavor, but too much will make the pita dense.
Warm water (around 110°F/43°C)
Yeast needs warm (not hot) water to activate. If the water is too cold, the dough won’t rise properly. If it’s too hot, it can kill the yeast.
Active dry yeast
This makes the dough rise and creates that airy structure inside your pita. If you use instant yeast, it’ll work just as well—but cut the proofing time slightly.
Granulated sugar
Just a touch to feed the yeast. It doesn’t make the bread sweet but helps speed up the fermentation process.
Salt
Essential for flavor. Never skip the salt—it brings balance and depth to the dough.
Olive oil
Adds moisture, flexibility, and a hint of richness. It also makes the dough easier to handle and improves shelf life.
With just these simple ingredients, you can make a pita that’s better than anything from the store.
How Much Time Will You Need?
Making pita bread is surprisingly quick for a yeast-based bread.
Active Time: 25 minutes
Rising Time: 1 hour
Cooking Time: 15 minutes
Total Time: About 1 hour 40 minutes
If you’re planning ahead, you can let the dough rise in the refrigerator overnight for even more flavor. But for same-day baking, this recipe delivers beautifully soft pitas in under two hours.
How to Make This Pita Bread Recipe
Here’s the step-by-step process that guarantees fluffy, pocketed pita every time.
Step – 1: Activate the yeast
In a large mixing bowl, combine warm water, sugar, and yeast. Stir gently, then let it sit for 5–10 minutes until frothy. If there’s no foam, your yeast may be dead—start over with fresh yeast.
Step – 2: Mix the dough
Once the yeast is foamy, add the flour, salt, and olive oil. Mix with a wooden spoon or spatula until it starts to come together.
Then, transfer to a floured surface and knead for 8–10 minutes until the dough is smooth and elastic. It should be tacky but not sticky. Add small amounts of flour if necessary.
Alternatively, use a stand mixer with the dough hook for 6–7 minutes on medium speed.
Step – 3: First rise
Form the dough into a ball and place it in a lightly oiled bowl. Cover with plastic wrap or a damp cloth and let it rise in a warm place for 1 hour, or until doubled in size.
To test, press your finger into the dough. If the indentation stays, it’s ready.
Step – 4: Divide and rest
Punch down the dough gently to release air. Divide it into 8 equal pieces and shape each into a ball. Cover them with a clean towel and let rest for 15–20 minutes. This allows the gluten to relax, making rolling easier.
Step – 5: Roll the pitas
Preheat your oven to 475°F (245°C). Place a baking stone or inverted baking sheet in the oven to heat.
On a floured surface, roll each ball into a 6-inch circle, about ¼ inch thick. Be gentle—don’t flatten them completely or they won’t puff.
Work with 2–3 at a time and keep the rest covered.
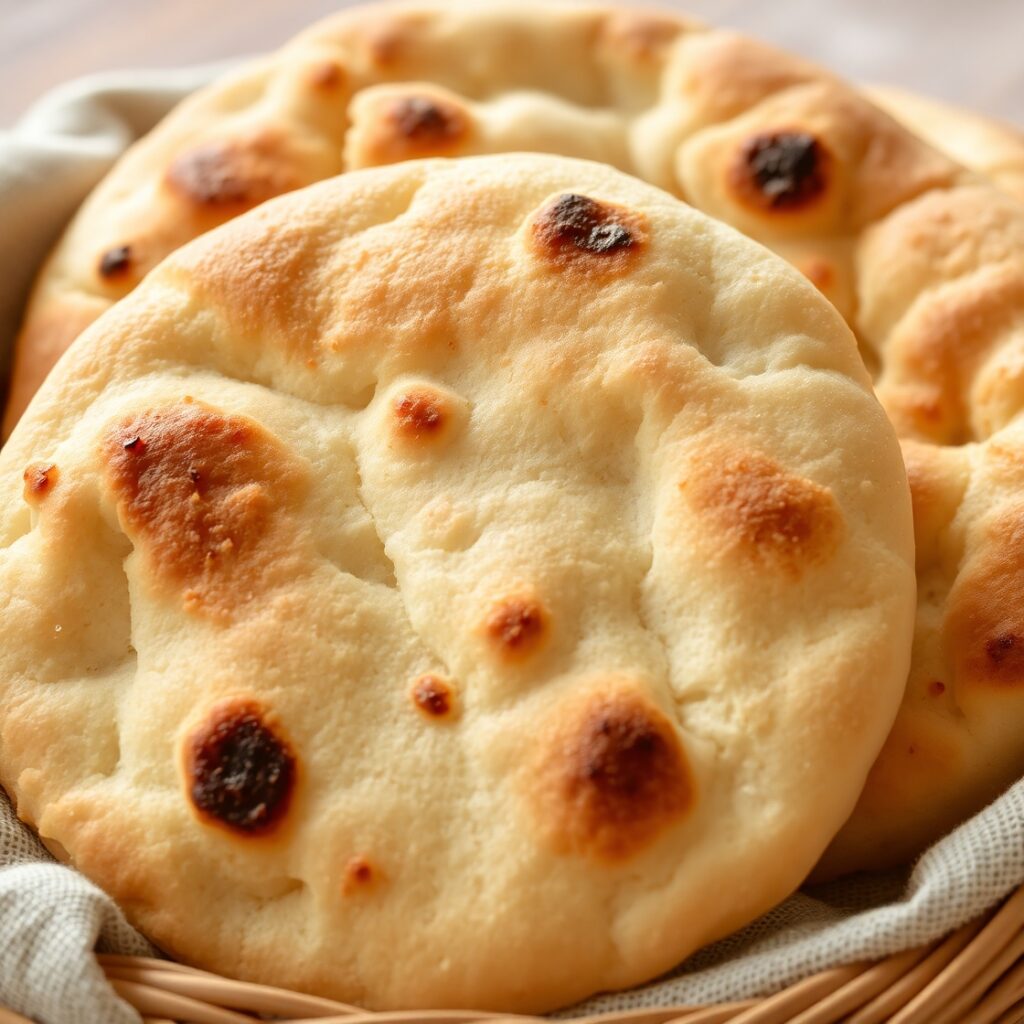
Step – 6: Bake until puffed
Carefully place the rolled dough circles onto the preheated surface. Bake for 3–4 minutes or until they puff up dramatically. Don’t wait for browning; they may still look pale but will be perfectly baked inside.
If your pitas don’t puff, they’ll still taste great—just more like flatbreads.
Step – 7: Cool and serve
Transfer the pitas to a clean kitchen towel and wrap loosely while they cool. This keeps them soft and prevents drying out.
Enjoy warm or store for later.
Substitutions
Flour
You can replace up to 50% of the all-purpose flour with whole wheat flour for a more robust flavor and added fiber. Don’t go beyond 50%, or the dough may not puff well.
Yeast
Instant yeast can replace active dry yeast 1:1. Just skip the blooming step and mix it directly with the flour.
Sugar
Honey or maple syrup can be used in place of granulated sugar in equal amounts. This adds subtle complexity without changing texture.
Olive oil
Any neutral oil (like avocado or vegetable) can be substituted. However, olive oil adds the best flavor and authenticity.
Salt
If using sea salt or kosher salt, slightly increase the amount, as they’re less salty by volume than table salt.
Best Side Dishes for Pita Bread
Here are three delicious accompaniments to turn your pita experience into a full meal:
1. Classic Hummus
Creamy, garlicky, and rich in tahini, hummus pairs beautifully with warm pita and makes the perfect appetizer or snack.
2. Grilled Chicken Shawarma
Marinated in spices and cooked to perfection, shawarma is a traditional filling for pita and elevates it into a hearty, flavorful meal.
3. Tabbouleh Salad
A refreshing mix of parsley, bulgur, tomatoes, and lemon. This bright, herbaceous side cuts through the richness of dips and proteins and adds balance to the plate.
Serving and Presentation Tips
Serving homemade pita bread warm is truly the best way to highlight its fresh flavor and irresistible texture.
Warm It Just Before Serving:
Even if you’ve baked the pitas ahead of time, a quick reheat in a dry skillet or wrapped in foil in a warm oven brings back the soft, fluffy texture.
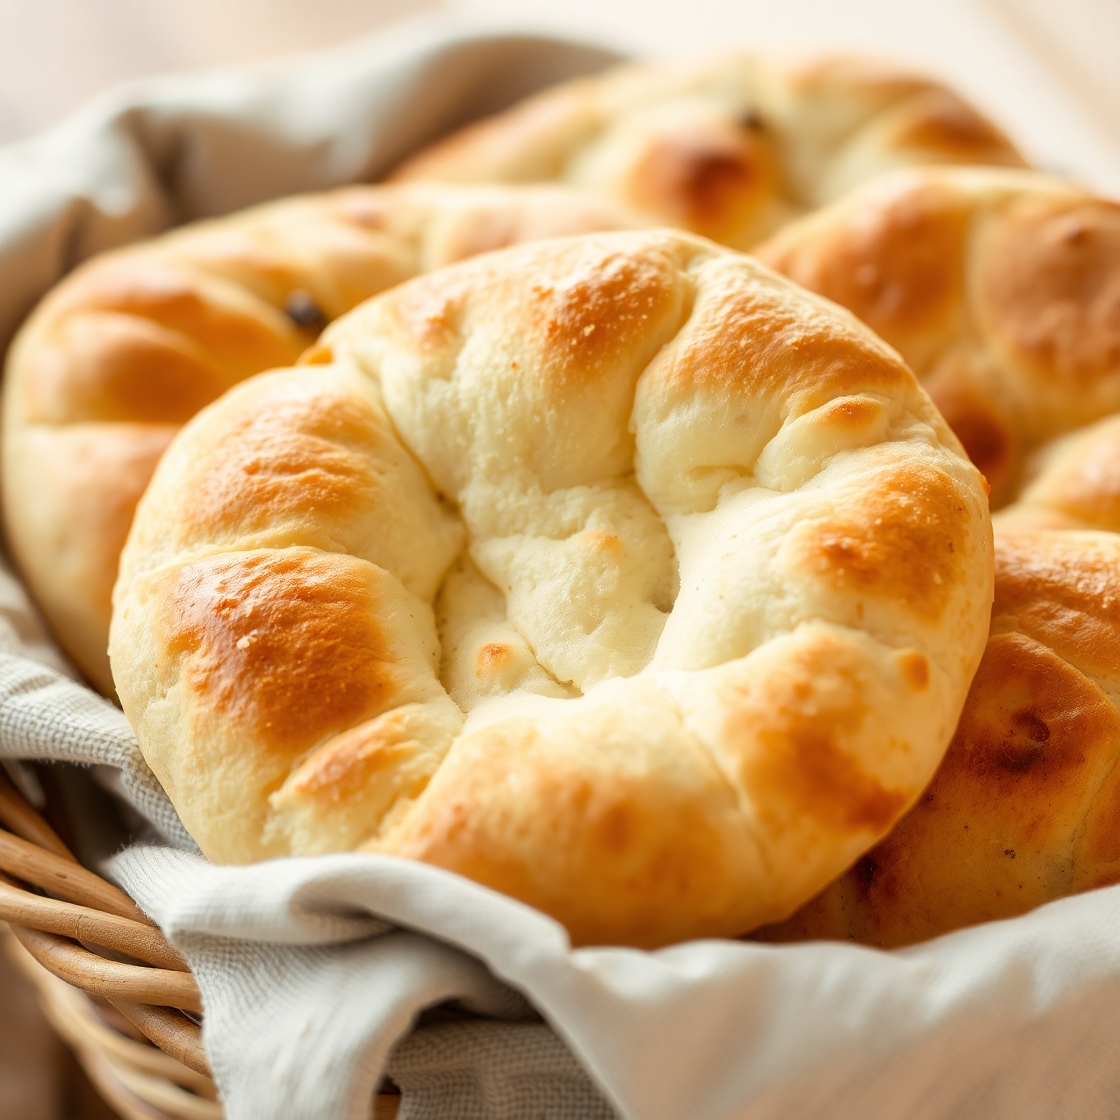
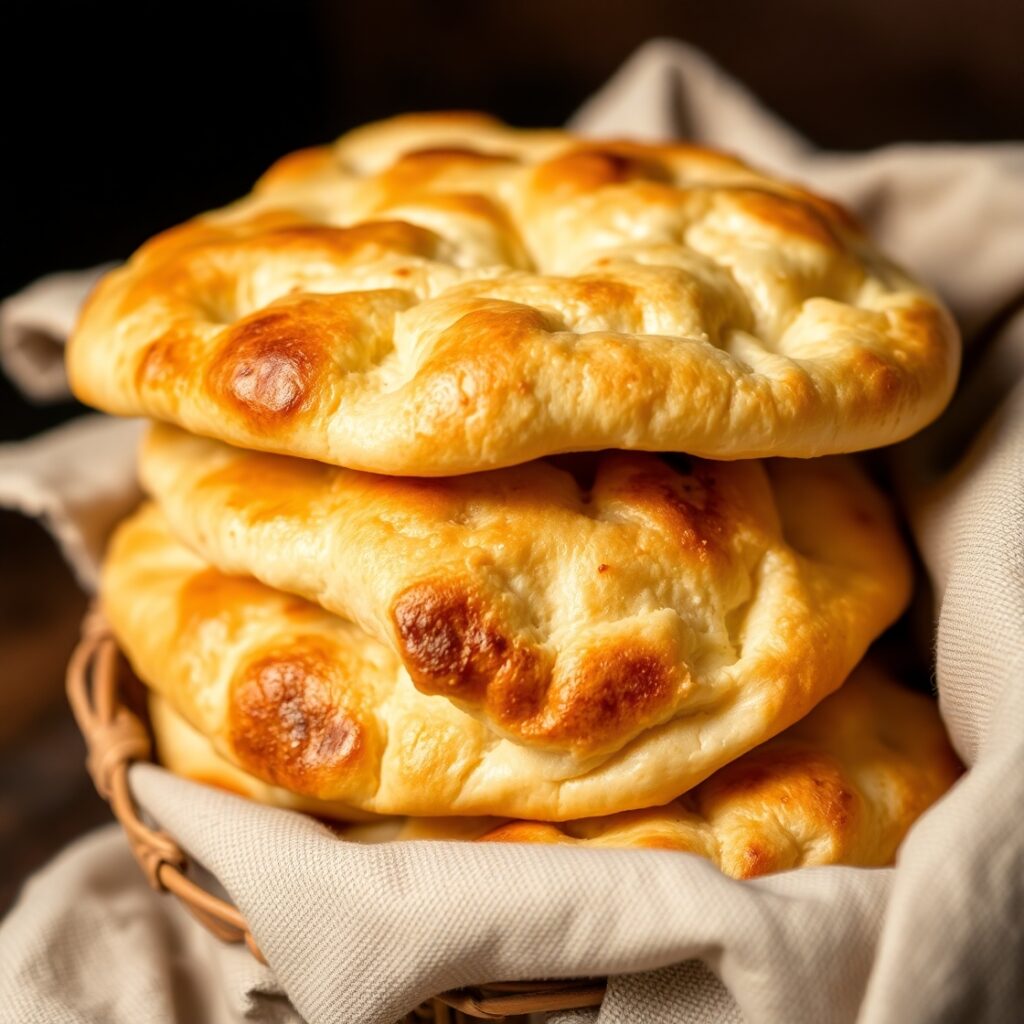
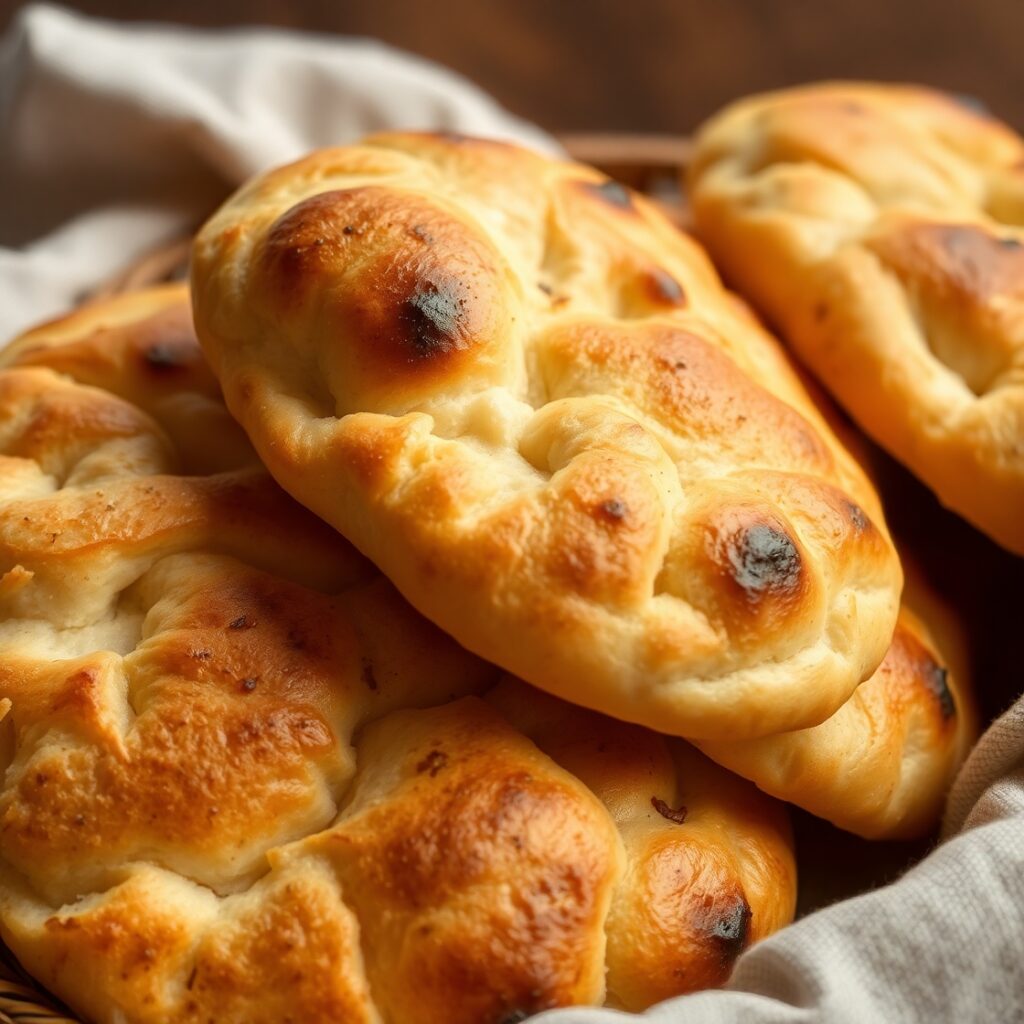
Serve in a Bread Basket:
Stack the pitas in a clean cloth-lined basket to keep them warm and soft at the table. Cover with a towel to prevent drying out.
Cut into Triangles or Halves:
For dips like hummus or baba ganoush, cut pitas into triangles. If using for wraps or sandwiches, slice in half and gently open the pocket.
Garnish Thoughtfully:
Serve with a drizzle of olive oil, a sprinkle of za’atar, or a side of colorful veggies and sauces for a restaurant-style look.
Tips and Tricks to Make This Recipe Better
Want that magical pocket in every pita? It all comes down to heat, hydration, and handling.
Use a Very Hot Oven:
The puff comes from steam. You need that initial blast of heat to create steam inside the dough—475°F (245°C) is ideal.
Preheat Your Baking Surface:
Don’t skip preheating your baking stone or sheet. A hot surface ensures instant steam creation and maximum puff.
Don’t Overwork the Dough After First Rise:
Gentle handling helps keep the air in. Rolling too aggressively can collapse those beautiful air bubbles.
Roll Evenly and Not Too Thin:
¼-inch thickness is perfect. Too thick, and they won’t puff. Too thin, and they become crispy like crackers.
Keep the Dough Covered While Resting:
Dough dries out quickly when exposed to air. Always cover it with a damp cloth or plastic wrap while it rests.
Common Mistakes to Avoid
Using Cold Water for Yeast Activation:
If the water is below 100°F (37°C), the yeast won’t activate properly. Use water that’s warm to the touch but not hot.
Underproofing the Dough:
If the dough hasn’t doubled in size, it hasn’t developed enough air to puff well. Give it time to rise fully.
Rolling the Dough Too Thin or Unevenly:
Inconsistent rolling leads to uneven baking and weak pockets. Aim for an even ¼-inch thickness across each circle.
Skipping the Preheat:
Baking pitas on a cold tray will prevent them from puffing. A hot surface is critical for steam development.
Opening the Oven Door Repeatedly:
Opening the oven too often releases heat, disrupting the baking environment. Try baking multiple pitas at once to limit this.
How to Store It
Room Temperature:
Let the pitas cool completely before storing. Keep them in an airtight bag at room temperature for up to 3 days. Wrap in foil or use a resealable plastic bag to prevent them from drying out.
Refrigeration (Not Ideal):
Refrigeration tends to dry out pita faster. Only refrigerate if your kitchen is warm and humid, and use within 2–3 days.
Freezing:
For longer storage, freeze pitas in a zip-top freezer bag with parchment between each piece to prevent sticking. Freeze for up to 3 months. Reheat directly from frozen in a toaster, oven, or skillet.
Reheating:
Wrap in foil and warm in a 350°F (175°C) oven for 5–10 minutes, or reheat on a dry skillet for 1–2 minutes per side.
FAQ
Q1: Why didn’t my pita puff up?
Several factors could be the cause: your oven or baking surface wasn’t hot enough, the dough wasn’t rolled evenly, or it was too dry. Make sure your oven is fully preheated and your dough is well-hydrated and properly rested.
Q2: Can I use whole wheat flour instead of all-purpose?
Yes, but use only up to 50% whole wheat flour. It adds great flavor but can make the pita dense and reduce puffing.
Q3: Do I need a baking stone?
No, but it helps. An inverted baking sheet or cast iron pan can work as long as it’s preheated well to replicate the heat of a baking stone.
Q4: Can I make the dough ahead of time?
Absolutely. You can refrigerate the dough overnight after the first rise. Let it come to room temperature before rolling and baking.
Q5: What’s the best way to reheat leftover pita?
Wrap in foil and heat in a 350°F oven or toast lightly in a skillet. Avoid the microwave unless you want a softer texture without crisp edges.

Pita Bread Recipe
- Total Time: 1 hour 40 minutes
- Yield: 8 pitas
- Diet: Vegetarian
Description
This soft, pocketed pita bread is easy to make with pantry staples and a bit of technique. Puffy and golden with just the right chew, these homemade pitas are perfect for stuffing, dipping, or eating on their own. Unlike store-bought options, they’re free from preservatives and are truly best fresh from your oven. Whether you’re a bread-baking novice or an experienced home cook, this recipe is approachable, forgiving, and absolutely delicious.
Ingredients
- 2 ¼ teaspoons active dry yeast
- 1 teaspoon granulated sugar
- ¾ cup warm water (about 110°F/43°C)
- 2 ½ cups all-purpose flour
- 1 teaspoon salt
- 2 tablespoons olive oil
- Additional flour for dusting
Instructions
- Combine warm water, yeast, and sugar in a bowl. Let sit for 5–10 minutes until foamy.
- Stir in flour, salt, and olive oil. Mix until a shaggy dough forms.
- Knead on a floured surface for 8–10 minutes until smooth and elastic.
- Place in a lightly oiled bowl, cover, and let rise for 1 hour until doubled.
- Punch down the dough, divide into 8 balls, and let rest 15 minutes.
- Preheat oven to 475°F (245°C) with a baking stone or inverted sheet.
- Roll each dough ball into a 6-inch round, about ¼ inch thick.
- Place on the hot surface and bake for 3–4 minutes until puffed.
- Wrap warm pitas in a clean towel while they cool.
- Serve fresh or store as desired.
Notes
For best puffing, make sure your oven and baking surface are very hot.
Don’t roll the dough too thin—this prevents proper pocket formation.
For added flavor, brush with olive oil and sprinkle with za’atar before serving.
- Prep Time: 20 minutes
- Cook Time: 15 minutes
- Category: bread
- Method: Baking
- Cuisine: Middle Eastern
Nutrition
- Serving Size: 1 pita
- Calories: 160